- Visit The offline download page for Java
- Run the .exe you just downloaded
- Once it’s downloaded you’ll be asked if you want to install
- At this point, check in C:\Users\<username>\AppData\LocalLow\Sun\Java\
- You’ll find the MSI in the subdirectory jre<version_number> –
- Do this for both 32-bit and 64-bit Versions
Java 8u162 installation via SCCM Current Branch (1803)
The MSI execution parameters are as follows
32-bit installation:
msiexec /i “jre1.8.0_162.msi” JAVAUPDATE=0 AUTOUPDATECHECK=0 RebootYesNo=No WEB_JAVA=1 /q
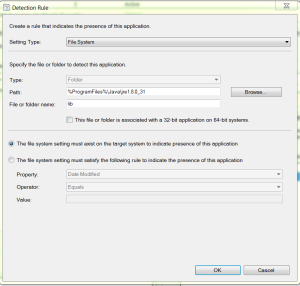
Detection Method:
64-bit installation:
msiexec /i “jre1.8.0_162.msi” JAVAUPDATE=0 AUTOUPDATECHECK=0 RebootYesNo=No WEB_JAVA=1 /q
Java 8U162 Update:
Many people are having trouble installing Java 8u25 and 8u31; I have finally resolved the problem.
1. following this website
However only modify the following properties values and make sure you change the customAction installexe properties to 3074.
AUTOUPDATECHECK=0
JAVAUPDATE=0
rebootyesno=no
Now you have a new MSI
I also found that if the following file exist the system will fail with a 1603: %programdata%\oracle\java (this should be a folder not a file)
3. Run the new MSI via SCCM as stated above and everything should install correctly.

Reblogged this on Software Knowledge Base.
LikeLike